
Creating worksheets is easy and fun to do to in a few simple steps. Have fun and explore getting creative!
- To create a worksheet you need to be logged in as a Teacher, and click on Worksheets
- Next, open the page My Worksheets, and click Add Worksheet
- Creating a worksheet takes several easy steps.
- First, you need to add your main graphic for your worksheet. This graphic can be the following file formats: PNG, JPG, JPEG, and PDF. All files must be under 5.5 MB file size limit. Click Add media button, and the Choose file to locate the file on your computer. You will then see your image has been uploaded, then click Save.
- Once you've done this, it will add this file to your media library so it can be used again to create other worksheets. If you have already added your file to the media library, select it by clicking on the image which will activate the orange check box, then click Insert Selected.
- Next fill out the information needed to create your worksheet starting with giving your worksheet a Title.
- Enter the body description of the worksheet. It's helpful to use this area to describe what the student is doing with the worksheet.
- Enter the Student Language.
- Enter the Subject.
- Enter the Main content.
- Enter the Other contents.
- Choose a Level.
- Select Yes or No for PDF Download. If you choose Yes, this will allow users to download your worksheet.
- Select From Age to enter a starting age range for your students and a To age.
- Choose whether to allow your document to be Private or Public. Please note, with free accounts, there is a limit on the number of worksheets you are allowed to create privately.
- Now we need to build the worksheet.To do this, you need to add Elements to your worksheet. You can do this by clicking on the Element on the left column. For instructions on how to add Elements, see below.
- Once you've selected an Element, it will appear on the worksheet. You can drag it into position by clicking on it and then move it where you'd like to place it. You can adjust it's size by hovering your mouse over the edge of the Element and then clicking to enlarge it to a size needed.
- Next, to configure the Element, click on the green pencil icon which will open the settings for the Element. Fill out the values and click Save.
- Do this for all the remaining Elements needed on the worksheet.
- Once complete you can click Save or Save And View worksheet to try out your new creation!
What are Elements and how to use them?
To create interactive worksheets, you need to use Elements to customize your worksheet and define how it can be used. Each interactive component like Drag & Drop, or PlayMP3 audio file is called an Element. To create Elements, click & drag Elements onto the worksheet. Get creative!
Here is a list of all the Elements:
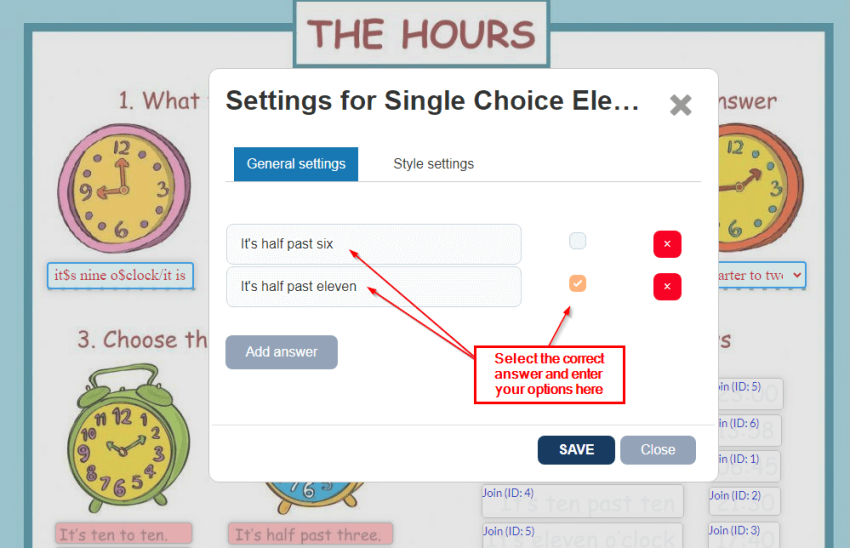
- Single Choice Create a list of options for students to choose from. Click the checkbox to designate the correct answer. Use this element for single-choice questions.
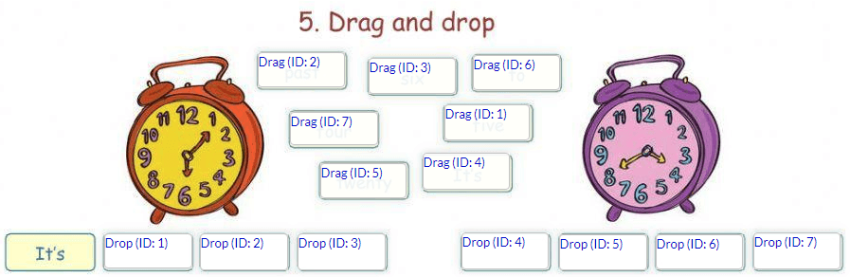
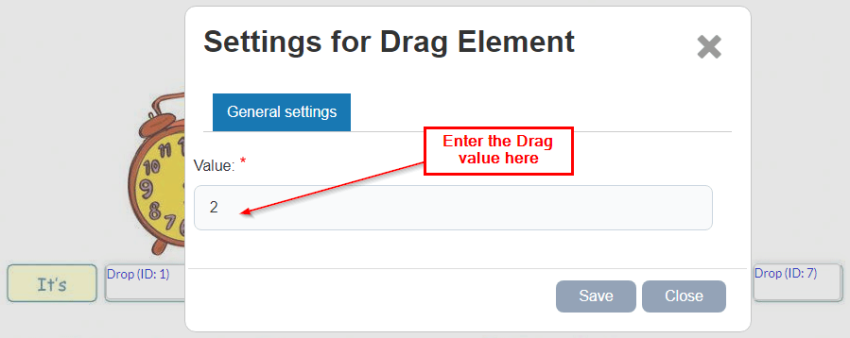
- Drag (and Drop)
Pair this Drag element with a Drop element. To connect them, input the same number or text value in both elements. This creates an interactive drag-and-drop activity for students.
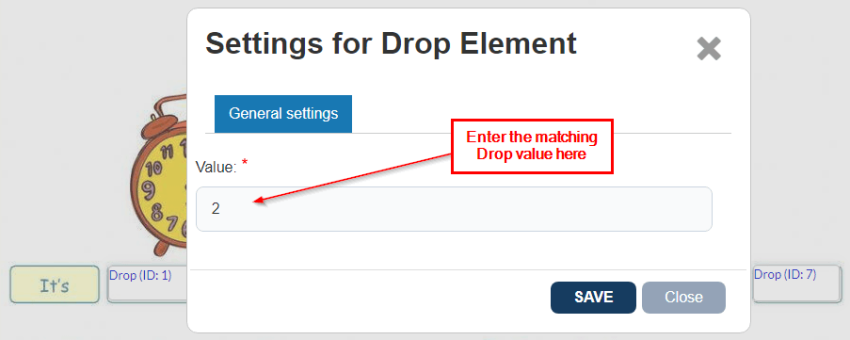
Pair this Drop element with a Drag element. To connect them, input the same number or text value in both elements. This creates an interactive drag-and-drop activity for students.
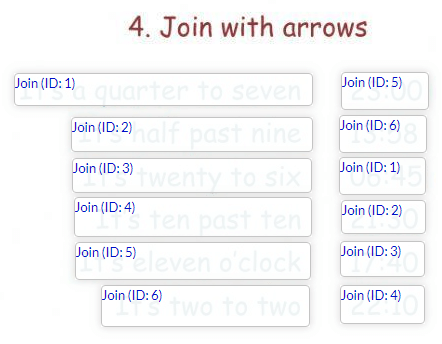
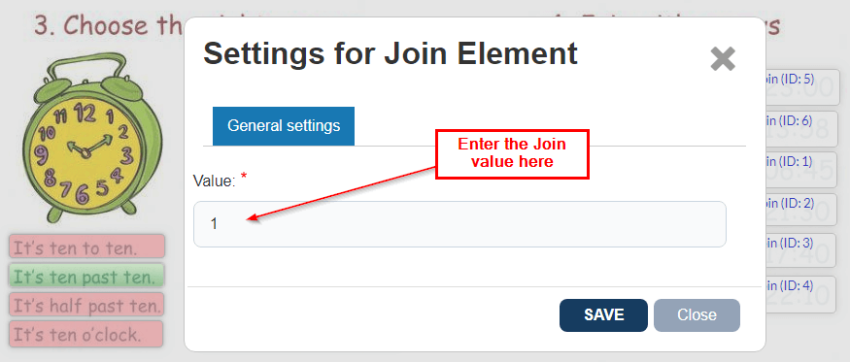
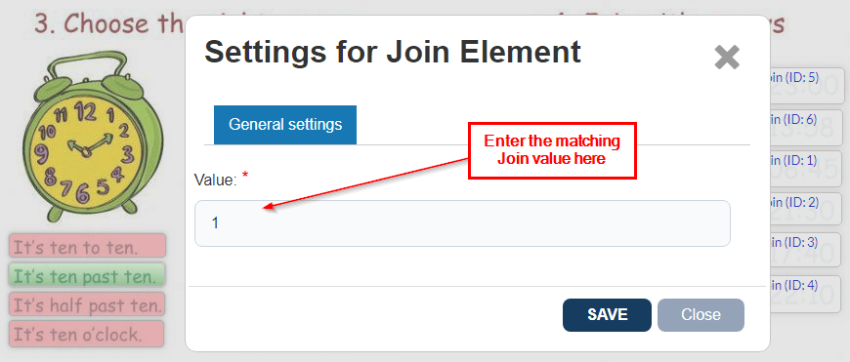
- Join (with arrows)
Use this element to visually connect components in an image. Create two "Join" elements by inputting the same number or text value into both. When students connect them correctly, they'll be graded accordingly. Ensure only two elements share the same value.
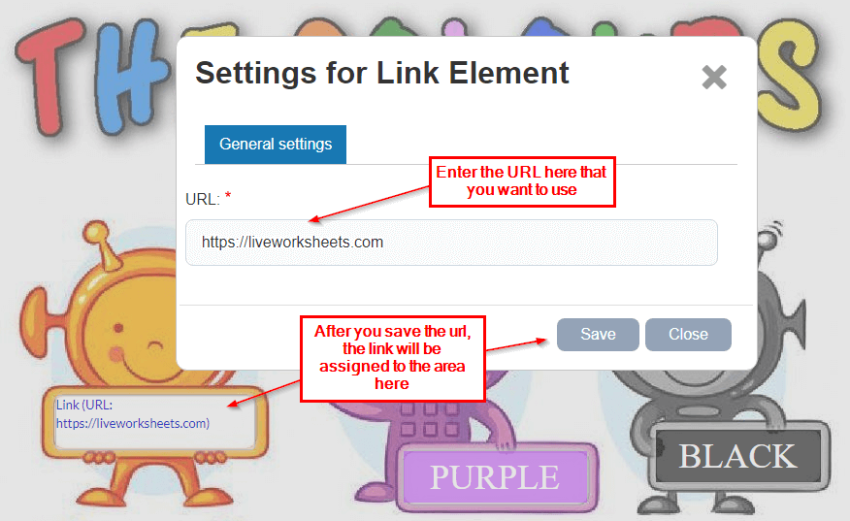
- Link
Create clickable links, such as to another exercise or reference. Click the Edit button to input the destination URL. Students will be redirected to the specified page when they click the link.
- Listening Create listening exercises with typed text. Click Edit to input spoken text or choose the speaker's language. May not work in browsers other than Google Chrome and Safari.
- PowerPoint Embed a Microsoft PowerPoint presentation. Obtain the presentation URL using the "Share & Embed" option in the PowerPoint application. The URL must start with "https://onedrive.live.com/embed?... ." Click Edit to input the URL.
- Play MP3 Add an MP3 file for instructions or sound cues. Click Edit to upload the file from your computer.
- Simple Text Display short text snippets to students. This feature is ideal for brief instructions or titles.
- Select
Use this element for Yes/No questions. Click Edit to designate whether a component provides a correct, negative or neutral answer.

- Speak Allow students to answer by speaking. Input text representing the correct answer and choose the speaker's language. May not work in browsers other than Google Chrome.
- Checkboxes
Use this element for Yes/No questions. Click Edit to designate whether a component provides a correct, negative or neutral answer.

- Value Boost a student's score for a particular exercise by overlaying the Value element on the answer element. Click Edit and select the boost value to multiply the score.
- Word Search (Puzzle) Create a word search grid with a map of correct answers. Set the number of rows and columns, then click on the cells representing correct answers.
- YouTube Player Embed a YouTube video by clicking Edit and inputting the video URL. Resize the box to adjust the player size.
- Textfield Use this element for typed-answer questions. Click Edit to input the correct answer value. Students earn points when their response matches the correct value.
Some Helpful Tips:
Select textboxes To select a textbox, put the mouse on the center of the box, until you see the move cursor Then click. The box must get blue. Moving Textboxes
Relocate a textbox by hovering the cursor over the center, clicking and holding down the mouse button. Then drag the box to the desired position.
Resize textboxes To resize a textbox, put the mouse on the border until you see the resize cursor. Then click and drag to resize the textbox. You can also click on the center to select the box and then press Ctrl key + the arrows in your keyboard to resize it.
Copy and paste textboxes This is very useful to make many boxes of the same size. Just click on the center of the box to select it, and then press Ctrl + C to copy and Ctrl + V to paste.
Delete textboxes To delete a textbox, click on the center to select it, and then press "delete" on your keyboard.
Undo and redo Just press Ctrl + Z to undo the last change, and Ctrl + Y to redo the last change.
Edit textbox style: font, color, border, background... You can change your textboxes' style. First click on "preview" and fill in the textbox with the answer. Then right click with your mouse on the box and you'll see a window with all the options: font, color, border, background...
Open-Answer Questions
For open-answer questions in your worksheet, add an appropriately sized blank textbox for students to input their response. Note that automatic grading is not available for this question type.
Still not clear or have questions? Choose any worksheet from our shared collection and click on "How was it made?". You'll see it's very easy.